

You’re missing out on some quality-of-life enhancing tricks that make using Teams so much easier.
Skim through 8 simple tips you probably didn’t know about. Although making a few small changes won’t transform your entire business in a day, starting small gets the ball rolling.
Let’s dive right in, and I urge you to test a few of these tips out right away to memorize them and add them to your toolbox.
Set your status in Teams
Status ≠ whether you’re just Online, Busy, or Away. Teams lets you create a Status Message, so everyone knows what you’re up to.
- Going to meet clients in person?
- Leaving early?
- Working on an important project and don’t want to be bothered?
Let others know!
To set up a custom status message, click on your name in the Teams desktop app choose Set Status Message.
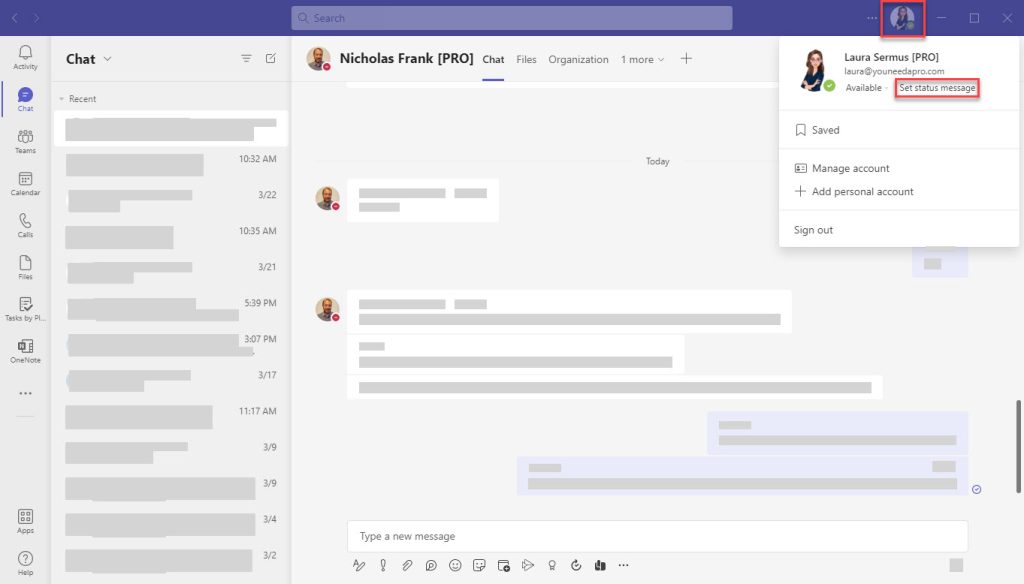
Then choose when you want the status to get removed automatically.

Easy way to help all colleagues stay up-to-date! The more details you add to your message, the better.
For larger businesses, it might be useful to set up an automatic reply (how you would set up an Outlook Out-of-Office reply) for when someone starts a chat with you or tags you. If you set up Teams auto-reply, you don’t have to set up Outlook’s replies manually as they are connected.
Two birds with one stone!
To set up the auto-reply, go to Set your Status Message and choose Schedule out of Office.
PS! Make sure to choose ‘send replies outside my organization’ if you want to set up Outlook’s automatic replies.
Add Microsoft Teams captions
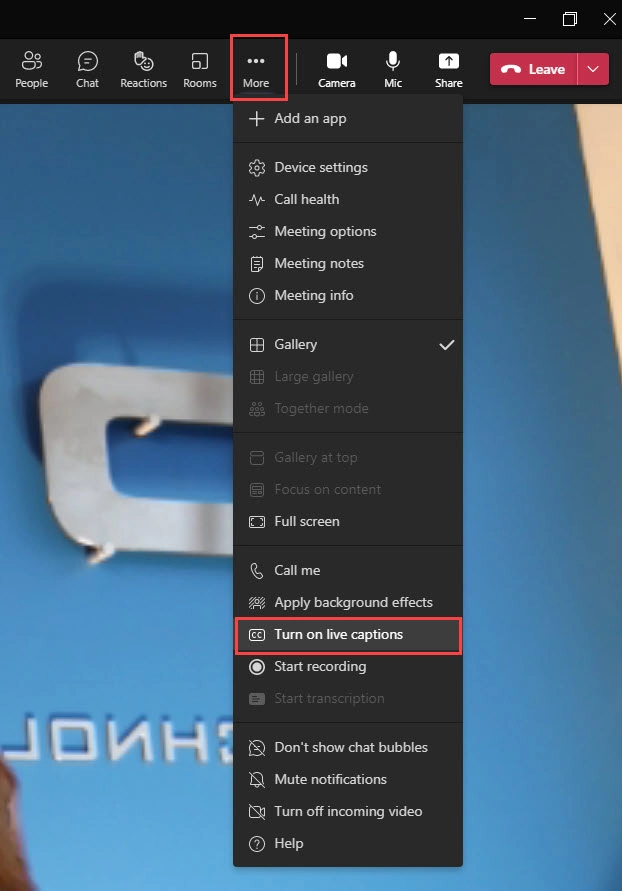
Adding captions to Teams makes your meetings more accessible and helps participants follow along. While in a meeting, click on three dots on the top-right and choose Turn on live Captions.
Using captions forces you to slow down a bit and speak clearly, which also does wonders for your speaking habits.
Trust me – you won’t use nearly as many uhs, ums, and yeahs in your next meeting. Using captions is also useful if you record your meetings and can use subtitles for later reviewing.
Turn on noise suppression
Microsoft Teams has built-in noise suppression functionality that works like a charm (especially at home). Best used if…
- Someone mows the lawn/blows leaves right outside your window
- Has their car alarm blasting
- Neighbors love using their vacuum
- Slams doors or stomps loudly
- Your pet or kids are being loud in the background
- You’re awkwardly shuffling papers around while speaking
Teams offer four levels of noise suppression – low, medium, high, and auto. The auto option suppresses noise as it sees fit, so when you have more general background noise, it gets blocked out.
Microsoft explains their suppression levels like this:
- High
Suppresses all background sound that isn’t speech. - Low
Suppresses low levels of persistent background noise, such as a computer fan or air conditioner. Use this setting for playing music. - Off
Noise suppression is disabled. Use this setting for high-fidelity microphones in low-noise environments.
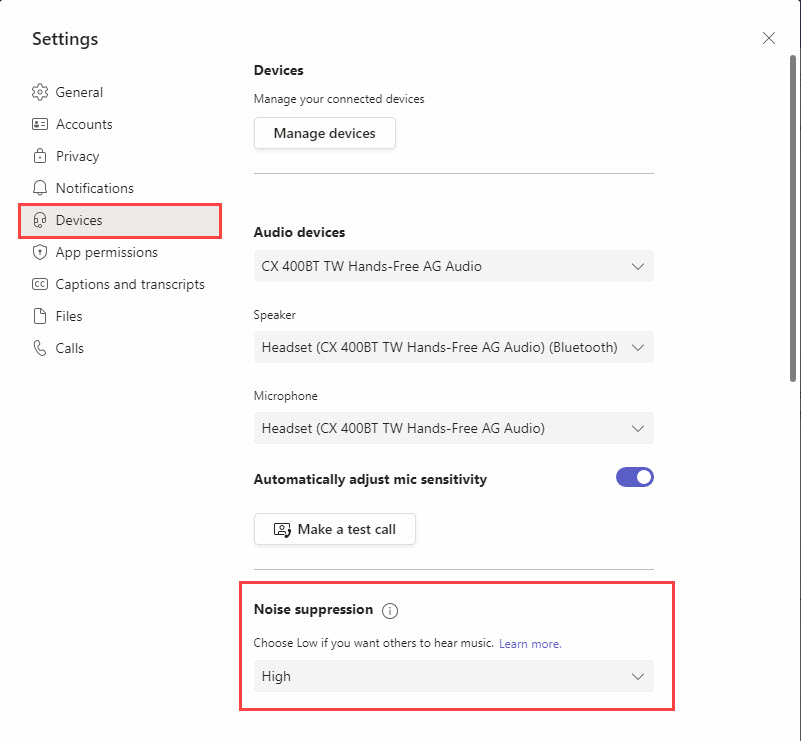
When in a Teams meeting, navigate to More > Noise Suppression and choose your preferred level.
You can also preset it before you’re in a meeting by clicking on the three dots on top of your Teams page > Settings > Devices.
Teams meeting background effects
Background effects can be useful to minimize distractions in your background. Teams offer several background templates, including basic rooms, classrooms, and fun, colorful ones.
The most basic and popular one is the blurred background – you can’t go wrong with that.
The best part? You can upload your own background images, such as your company logo (check my example above!), or just a background close to your heart. The options are virtually limitless and can either spice up your meetings or add a touch of professionalism.
See previously visited pages
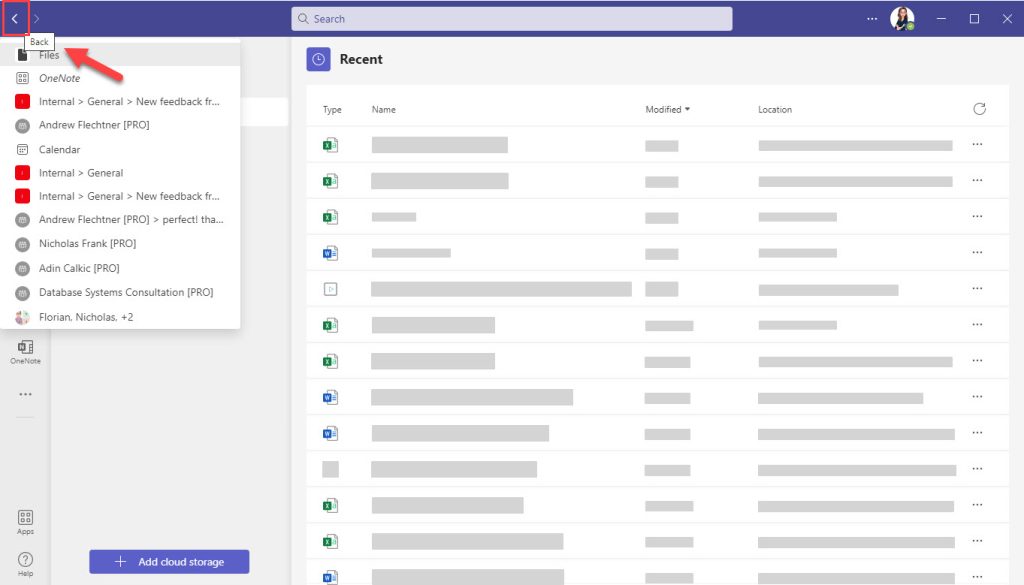
When you constantly switch between pages, it’s difficult to find where you left off and try to find your way back. Try hovering over the back arrow (top left of the screen) for a second to see the list of pages you had opened recently.
It works the same way as your browser’s back button and removes the need to click through tabs and teams to get to where you were.
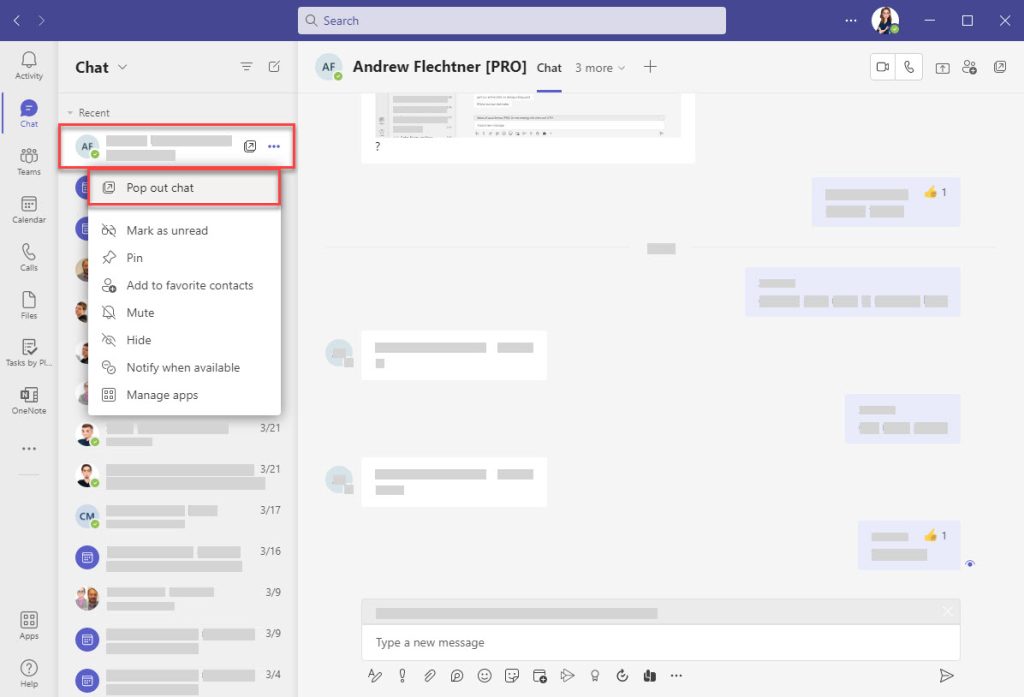
Pop out a chat
When you’re working on something in Teams and need to check another chat, it’s frustrating having to change tabs and stop your workflow.
Instead of switching windows, right-click on the chat window and choose Pop out chat.
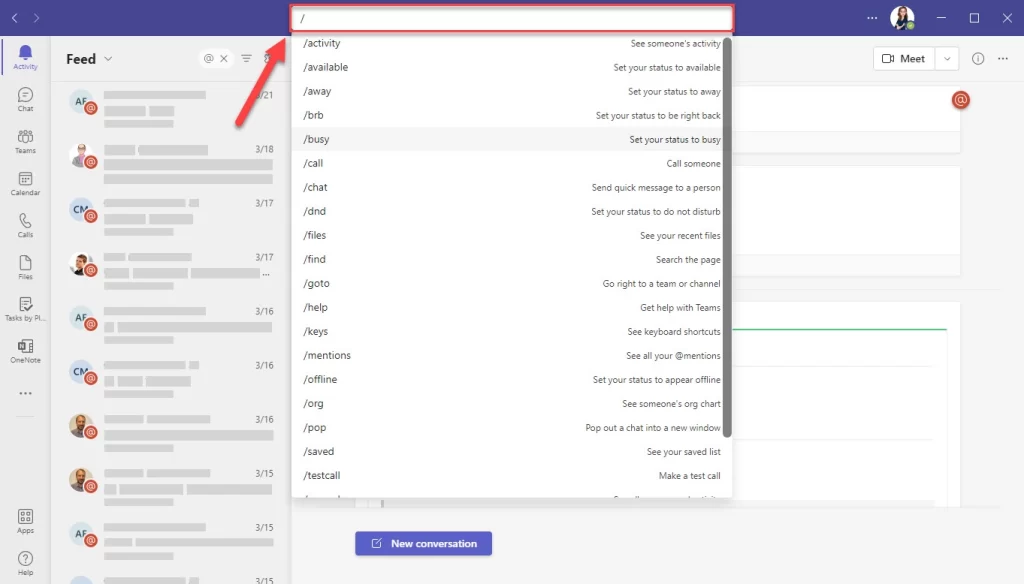
Use Teams shortcuts
Use the slash notation in the main search bar at the top of the page to access useful shortcuts. These shortcuts include:
- /testcall
Echoes your video and sound back to you, so you can be prepared for your meeting ahead of time. Super useful for fixing any issues before launching into a live meeting. - /call
Type in the colleague’s name you wish to call. Much simpler than finding the person in your contact or chat list and hitting the ‘call’ button. - /mentions
See all instances of when someone mentioned (tagged) you in Teams from one place.
Tip! Just type / to see all available options in Teams
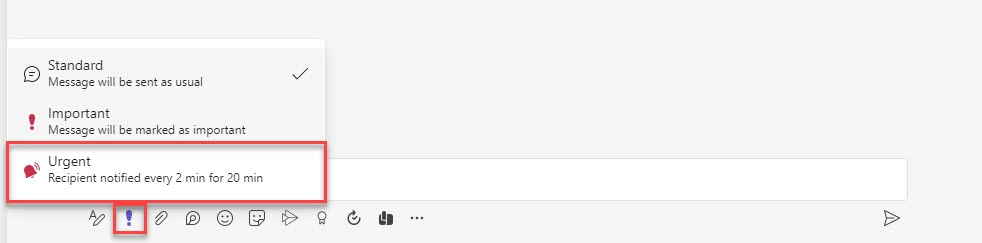
Tag messages as urgent
When sending a message on Teams that needs immediate input, you can tag it as ‘Urgent.’ This will notify the recipient every 2 minutes via a popup for 20 minutes.
You can also send a less aggressive ‘Important‘ message, which shows up with distinct red lettering and exclamation point – but won’t spam the recipient.
Select the exclamation point under your message to tag a message as urgent or important.
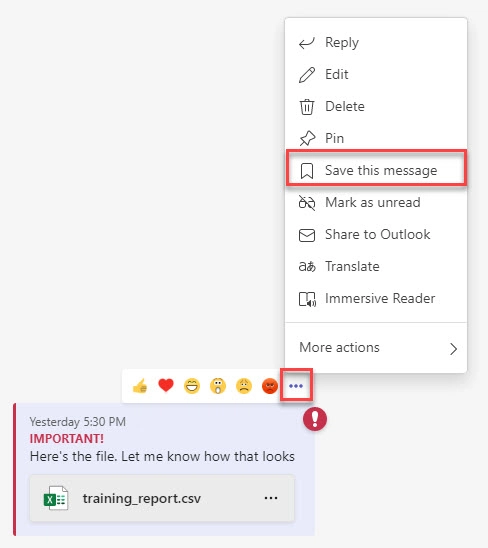
Bookmark Teams messages for easy access
When a colleague shares a file in a message that you refer to often, it’s worth bookmarking it. Teams bookmarks work like in any other software by adding all bookmarked info in one easily accessible place.
To bookmark a message, hover over a message, click on the ellipsis and choose Save this Message.
To find your bookmarks, type in /saved in your top search bar. On the left-hand column, you will see all your saved messages.
You can only bookmark a file if it was sent through a message.